
Our Blog


Perfection Cleaning BC doesn't just offer great house cleaning Langley. We also offer residential and commercial cleaning services for Surrey, White Rock, Abbotsford, Coquitlam, Port Moody and more! Below we have put together this blog to offer a host of tips and tricks that we have found, researched and even used ourselves in our every day housecleaning. Be sure to bookmark this blog page and check back as we are posting new articles monthly.
BATHROOMS | BC | BEYOND BASIC CLEANING | CARPETS | CLEANING WITH KIDS | DEEP CLEANING | GROUT | HOUSE CLEANERS | HOUSE CLEANING | HOUSE KEEPING | LANGLEY BC | LAUNDRY | MAID SERVICE | OTHER CLEANING | SERVICES | TIPS & TRICKS

0 Reverse the Wearing Shoes In The House Damage
If you caught our blog post last month about the reasons NOT to wear your shoes in the house, this is the follow up. If you’ve been wearing shoes inside your house, don't panic. Your floors might be teeming cesspools of dirt, germs, feces, bacteria and more, but not all hope is lost. REVERSE THE DAMAGE OF WEARING SHOES IN THE HOUSE The first thing you should do is to start removing your shoes at the entrance of your house. It’s a tough habit to get into, so design experts suggest creating a friendly entry space either right outside your door or just inside your front door if you’re pressed on space. Set up a bench where you can easily sit to put on and remove your shoes, and include some shoe storage shelves where you can place your footwear for safekeeping and to keep them out of the way. You’ll also want to encourage guests to remove their shoes. One way to help enforce the rule is to hang a “Please remove your shoes” sign near your entryway. You may also want to consider deep cleaning your wood, tile and carpet floors with a disinfecting steam cleaner. This will give you a clean slate and keep your floors safe, provided you stick to removing your shoes before entering your house each and every time. Credit: Original article on FootFiles. * Perfection Cleaning does not guarantee or warranty any suggested cleaning methods or tips. Use at your own risk.
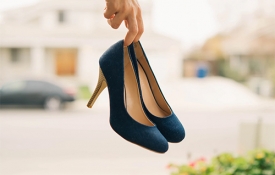
0 Remove Your Shoes Before Going Inside
Are you removing your shoes before going inside your house? No? Well, you may want to start. What we have to tell you here may shock you!! REASONS TO REMOVE YOUR SHOES BEFORE ENTERING YOUR HOME 1. Bacteria Lives On Shoes Longer Than Almost Everywhere After thorough researching, the University of Arizona found that bacteria live a very long time on shoes — longer than in most other places. They speculate the reason is because there is a continuous build up of new bacteria that feeds the growth of the existing bacteria. 2. Shoe Soles Are Dirtier Than Toilet Seats It might sound unbelievable, but the bottom of your shoes contain more bacteria than an average toilet seat. According to Jonathan Sexton, a research assistant at the University of Arizona’s College of Public Health, toilet seats generally have about 1,000 bacteria or less, while the soles of shoes typically play hosts to millions. And speaking of bathrooms, public restroom floors have been found to contain over 2 million bacteria per square inch, and you can bet a lot of that ends up on your shoes every time you go “powder your nose.” 3. Feces Are Present On Almost 100% Of Shoes Walking around your house in shoes could just as well be the same as wiping poop all over your floors. The reason? A University of Houston study found that coliforms, which are universally present in feces, are found on 96% of shoe soles. What’s more, 39% contain C.diff, an antibiotic-resistant bacteria that causes diarrhea, and 27% contain E. coli. 4. Wearing Your Shoes Inside Could Increase Your Risk For Cancer A Baylor University study found that people who live near asphalt roads sealed with coal tar have an increased risk of cancer from toxins, as the substance is found on sidewalks and other walkways due to rainwater transfer. Meanwhile, another study done by the Battelle Memorial Institute found that lawn care chemicals can also be transferred to walkways via rain, meaning your shoes can pick up dangerous lawn care toxins regardless of whether or not you walk directly on the grass or other chemically treated areas. And another chemical that gets transferred to sidewalks via rain water and other various ways that then ends up on the bottom of your shoes: automobile gasoline. 5. There’s A 90% Chance Whatever Is On Your Shoes Will Transfer To The Floor Of Your House Numerous tests have shown that bacteria, fungus and viruses present on the bottom of your shoes don’t wear off the more you walk. Those suckers cling to shoe soles for dear life and eventually end up on the tile, wood and carpet floors of your house. In fact, U of A scientists found that whatever is on the bottom of your shoes will end up on your floor 90% of the time. And if you have carpet, that number is actually 99%. 6. Despite What You Think About Building Up Your Immunity, You’re Wrong When It Comes To Shoe Bacteria Sure, exposure to some types of bacteria is actually a good thing as it builds up the body’s immunity and makes you stronger. However, most of the bacteria present on shoes is from fecal matter, and the truth is that most of it can be pretty harmful to your health. Therefore, medical experts advise that this be one place you skip purposeful exposure to help “boost your immunity.” So there, suckers! Credit: Original article on FootFiles. * Perfection Cleaning does not guarantee or warranty any suggested cleaning methods or tips. Use at your own risk.
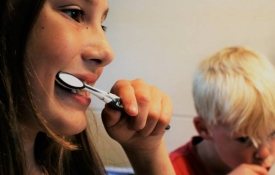
0 5 Things You Might Not Be Cleaning, But Should!
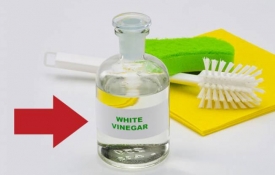
Everyone knows we have to clean the dishes, we have to clean the toilet, we have to vacuum, etc, etc, etc, but here's a list of things that may not have crossed your mind. Now if you clean a bunch of the things on this list, awesome! Give yourself a pat on the back for taking your home cleaning to the next level. But for many, this is a list of things they may never have thought of cleaning. Or did, but it was so daunting, they just couldn't bring themselves to do it. So, let's dive in, shall we..... 1. Hairbrushes That hairbrush of yours can get pretty funky with all the moisture, product and let's face it, germs, that infest it on a regular basis. Drop that bad boy into some warm water and shampoo and let it soak for a bit. Then, you may have to take some scissors and cut away the coiled up hair, to get that brush back to a clean, healthy state. 2. Toothbrushes You would think that since a toothbrush is a cleaning tool, with a cleaning (sometimes whitening) agent on it, and we rinse it during the procedure of brushing our teeth, that it would be constantly cleaned. Think again. Those badboys can get germs and plaque inside those bristles and they can be stubborn to remove. Try soaking those smelly toothbrushes in vinegar to give them that extra clean. 3. Toothbrush Holder On the topic of toothbrushes, how about that toothbrush holder. Does yours look all encrusted like something that sank with the Titanic? Take a bush (not your toothbrush) and some cleaner to it and polish it back up to it's former lustre. 4. Vacuum Filter That vacuum does alot of work for us, doesn't it? And as you can imagine, the filter get absolutely filthy! Now, we have read that you can put those filters in the dishwasher, but we're not really sure how good of an idea that is? Depending on the dishwasher and amount of soiling on the filter, you could end up really clogging up something. Maybe it may be safer to just sit the filter in the sink and use the power head on your tap to spray it clean? Get those allergens and germs cleaned right out of there. 5. Remote Control That tv remote with all the fingers and thumbs mashing down the buttons, foods and liquids getting spilled on it. It's been through a lot and it shows. Give that badboy the cleaning it deserves. Remove the batteries first, and then using a microfiber cloth, or old, clean toothbrush, and a bit of water to dampen the cloth or brush, start to scrub away the grime and germs. Don't spray anything onto the remote. You may just end up wrecking the circuitry. So, there you have it. 5 things that you may not have thought about or have dreaded cleaning, that you really should! We know there are many more things out there, but we will save those for another post. What other items do you clean that you think many people don't think of? Let us know in the comments below. * Perfection Cleaning does not guarantee or warranty any suggested cleaning methods. Use at your own risk.

0 Disinfection | Not just in the home!
Imagine a petri-dish filled with bacteria, then add a recline function and limited legroom. Now you’re accurately imagining the typical airline seat. According to study after study, airplanes are filthy places and the average tray table, for instance, is exponentially more disgusting than a home toilet seat. Other top spots for airplane germs include seat-belt buckles, seat-back pockets, and the tops of seats (especially aisle seats, since countless people touch them for balance as they walk by in flight each day). But take heart, germaphobes—and anyone else who doesn’t want to spend their whole vacation hacking up a lung. There are small steps you can take that will make your assigned petri dish a little less squirmy. Here’s how to disinfect your airplane seat and boost your chances of an illness-free vacation. A Step-by-Step Guide to Disinfecting Your Airplane Seat With minimal supplies and just a moderate tolerance for weird looks from your fellow passengers, you too can have the cleanest seat on the plane. Here’s how to get there. Pack Disinfecting Wipes You’re going to need to plan here a bit and score some disinfecting wipes before you get on the plane. You can opt for a familiar brand name like Clorox Disinfecting Wipes, which come in handy packs of nine or 15. Note that these have a pretty intense scent (the lemon is not what I’d call “good lemon,” and whatever the green package scent is smells a bit like a freshly cleaned public bathroom). You can also get medical-grade disinfecting wipes with a milder scent, or, in a pinch, you could use wipes primarily meant to disinfect hands rather than surfaces, such as Purell Individual Sanitizing Hand Wipes (which also come in travel packs). Get Your Wipes Out as Soon as You Board. Packing wipes is only half the battle. Once you’ve boarded, you’ll need to overcome your aversion to creating a minor spectacle as you stow your gear, whip out your wipes, and get disinfecting. If it helps, you can pretend that those are stares of envy at your traveling prowess rather than garden-variety side eye. There’s a right way to use disinfecting wipes, and many wrong ways. To do it correctly: Wipe down all hard, nonporous surfaces thoroughly. Make sure you read and follow the package instructions about how long the surface needs to stay visibly wet. This ranges from about 30 seconds to four minutes. This is when the germ-killing magic happens, so you can’t rush it. Note that this means you’re going to be provisional for a bit longer before you settle and make yourself comfortable. Kidding: Everyone knows you’re not going to be comfortable on the plane. But at least you can maybe emerge illness-free. But What About Upholstered Surfaces Don’t use disinfecting wipes on upholstered surfaces: It won’t work and it will make the fabric wet, which creates a whole separate problem. If you’re concerned about exposure to germs on fabric seats, you can pack a disposable airplane seat cover; or, if you want to minimize waste, get washable and reusable seat and tray table covers. There are also smaller disposable covers that cover just the airplane tray or the headrest. Bonus PSA About Seatback Pockets No pocket needs a protector like the airplane seatback pocket, home to one of the airplane’s highest concentrations of germs. If you’re one of those travelers who uses this pocket to stash your water bottle or extra snacks in the seatback pocket, just please don’t ever again. Until some genius (you perhaps?) invents a disposable liner for the seatback pocket, opt for a seatback-pocket replacement accessory like the Flight 001 Seat Pak (I’ve had mine for nearly 10 years and swear by it) or Genius Pack’s High Altitude Flight Bag, which both hang from the seatback tray toggle. * Perfection Cleaning does not guarantee or warranty any suggested cleaning methods. Use at your own risk.
0 Fall Cleaning & Making Money
Fall is a great time to declutter. With colder months approaching, you’ll be able to get the unnecessary clutter, dust, and germs out of your home before you’re cooped up in there for a while. What if you could better your finances by tidying up? These fall cleaning tips can help you save and make money. Save Money Decluttering Your Home This Fall Yes – that’s right. In addition to making it easier to relax and unwind in your home, decluttering can help you save money. While you are decluttering and cleaning, you may realize that there are items in your home in need of attention. For instance, if you clean your windows, you may notice damages that may impact the ability to heat your home through the winter. Another way fall cleaning may help save money is in maintaining some of your more expensive appliances. One great thing to do in the fall is dust and clean your refrigerator’s condenser coil. Doing this can prevent you from having to call a handyman down the road as well as keep your food at the correct temperature, preventing spoiled food items. Inside the fridge, you can also get rid of expired items and clean shelves to prevent illness (another opportunity to save). Dusting the entire house while you’re doing your fall cleaning is recommended as well. Dust can build up and cause health issues and allergies. Getting rid of that will help prevent illness throughout the winter. While you are in the kitchen, take an inventory of what you have in your pantry and make a list. This will give you an idea of what you already have and prevent you from spending unnecessary cash at the grocery store. Lastly, don’t forget to flip your mattress! Doing so will extend the life of your mattress and, ultimately, save you money. Make Money Fall Cleaning If you’re aiming to rack up savings through fall cleaning, you may also be interested in knowing that you can make money as well. While you are going through closets and getting rid of things, set items aside that you may be able to sell. Thankfully, with modern technology, you won’t even have to set up a yard sale if you don’t want to. You can post your items for sale online. Facebook Marketplace: The Facebook Marketplace is a great way for people in your area to check out the items you have for sale. It is essentially an online yard sale. Many of these “yard sale” pages have search functions for people looking for something specific so be sure you use good keywords in your description. People in the Saving Advice forums have chatted about their experience with the Marketplace, see what they are saying. Craigslist: Craigslist is another great place to post your unwanted items. Read about how to make money on Craigslist here. eBay: One of the more popular places to post items for sale is eBay. Many sales are auction-style and it can be exciting to watch the price of your items go up. Here’s how to make money on eBay. Even if you don’t feel like posting your items for sale or having a garage sale, you can still benefit financially by donating your items. Be sure to get a receipt when you make your donation so that you’re able to deduct it from your taxes next year. Now that you know how decluttering and cleaning can help your mental, physical, and financial health, here is the ultimate fall cleaning checklist to get yourself and your home ready for winter. Would you add anything to our checklist? Let us know in the comments below. * Perfection Cleaning does not guarantee or warranty any suggested cleaning methods. Use at your own risk.

0 That Old House Smell...What Causes It & How To Get Rid Of It
Everyone knows that musty house odor is coming from somewhere. But where? Let's find out how to neutralize it. "Hmmm, kinda has that old house smell". Those dreaded words evoke something rather frightening and repellent to most homeowners. You know what we're talking about, right? It's that musty odor that creeps up and greets you the instant you set foot inside an older home. What is this mysterious stench, anyway? And more importantly, is there a way to get rid of it? Well, we are turning to science to find out. What causes that old home smell? "Three things that musty old houses have in common: little ventilation, high humidity, and darkness," says Bill Carroll Jr., an adjunct professor of chemistry at Indiana University. That makes these places the perfect petri dish for mold to flourish, which happens to be the main purveyor of that "old house smell." That said, what you’re smelling isn't mold per se. "What you're smelling are called MVOCs: Mold Volatile Organic Compounds," explains Carroll. "These are chemicals associated with a certain stage in the mold life cycle that are volatile enough to evaporate, but also have a strong enough inherent odor to be detected. The good news is that this funky smell isn't a health issue", says Carroll. "It’s just annoying — and probably more than a little embarrassing — particularly if you're trying to sell your house to people who wrinkle their nose as soon as they enter your home. Luckily, though, there are ways to get rid of the funk." How to remove old house smell: Dry the place out "Opening up the windows and airing the place out - like your mother did when spring came - can help,” says Carroll. If your house tends to be humid and you’re sure you don’t have any leaks, "keep your air-conditioner or a dehumidifier running," suggests Carroll. Oh, and if you do have a leak of some kind - even if it's just a leaky faucet? "That needs to be fixed before any progress can be made," notes Carroll. (Progress meaning "fresh-smelling house.") Let the sun shine in "Light, especially sunlight with its ultraviolet component, is a good disinfectant," Carroll notes. "After all, UV is used to disinfect water in some pool systems." Clean your couch Sorry to be the bearer of bad news, but if that old house smell is coming from your couch, it may be more of an "old couch smell" instead. In fact, all upholstered furniture and your carpets could be culprits. "Soft stuff absorbs ambient moisture," says Carroll, which can lead to mold growth. Softer materials absorb "ambient moisture," says Bill Carroll Jr. "Worst case, all the soft stuff has to go or be professionally deep-cleaned," he says. If you work hard to reduce the humidity in your house, over time, the soft stuff may relinquish some of its ambient moisture as well, dry out, and start resisting mold growth. "But that takes time, because it takes a while for the moisture deep inside the furniture to migrate out," Carroll says. "And a good cleaning of the hard surfaces with a disinfectant doesn’t hurt either." Deep-clean the guts of your house "Furnaces and air ducts can have a tremendous amount of mold that can grow in them when they’re not being used," says Leslie Reichert, cleaning expert and author of "The Joy of Green Cleaning." Not to mention that air-conditioners can also trap mold and mildew in their filtering systems. If you think these little tunnels are the source of the smell in your home, hire an HVAC professional, who can actually use a tiny camera to make sure all the gunk is located - and removed. Declutter under every sink "Nope," you may be thinking. "I don’t have any leaks." But if you’ve got a gazillion cleaning supplies and sponges under your kitchen sink and two gazillion beauty products, would you really know? So clean it out. "Getting things out from under the sink lets you see if anything is dripping or molding," says Reichert. "Also, you can check for dampness or leaking in the piping." Wash your walls Walls can waft an old house smell, too. Reichert advises dissolving a half cup of borax in a bucket of hot water (32 ounces), then adding 2 cups distilled white vinegar and 16 ounces of hydrogen peroxide. Right away, wipe down your walls and let them air dry. "This will remove grease, dust, and mildew, and also remove smells that have embedded into wall surfaces or wallpaper," Reichert says. Repeat whenever you catch a whiff of a "stale" smell. Neutralize the air An open container of baking soda or white vinegar, kept in an unobtrusive place (for example on top of your kitchen cupboards), can help absorb smells and clear the air. Experts also recommend FreshWave or DampRid, two all-natural substances that absorb smells and trap excess moisture in the air. * Perfection Cleaning does not guarantee or warranty any suggested cleaning methods. Use at your own risk.
When it comes to cleaning, there are a lot of misconceptions and inaccurate information. Perfection Cleaning is here to set the record straight to ensure you have the proper information to keep your home safe and tidy.Myth 1: Bleach is an idea cleaning agent for every surface in your home. While bleach kills germs quickly, it’s not great for breaking down build up on surfaces. Aside from that, bleach can be harmful to use if you have children or pets especially in strong concentrations. If using bleach, be sure to be wary of the concentration and only use it in areas where it will not affect more sensitive individuals in your home.Myth 2: Any cleaner will do. Many people simply grab a bottle of cleaner from the store and start spraying everything at home with the same cleaner. It’s true that there are many good multipurpose cleaners out there, but that doesn’t mean they are all multipurpose. Always pay attention to the label and determine where it will be of best use in your home.Myth 3: Cleaners need to be sprayed on and immediately wiped off. There are many products out there that work right away and do not require soaking, however, that’s not true for them all. Some products are required to sit for a period of time in order to work effectively leaving a sanitized surface behind. Always read the instructions on the bottle to get the best results possible.Myth 4: Bleach works best with hot water. Many people believe these two are a perfect match, when truthfully the combination can leave white surfaces with a yellow tinge. To avoid these stains, never mix bleach and hot water.Myth 5: Vinegar is an effective disinfectant. Vinegar is great for removing gunk from surfaces, but it does not kill all germs. When it comes to cleaners including vinegar, you need to determine what you are trying to clean with it. Vinegar may work for some germs but not all which is important to remember if it’s the cleaner of your choice.Myth 6: Using detergent makes everything cleaner. Sure, extra detergent can help when it comes to heavily soiled clothing, however, when you use extra detergent in regularly soiled clothing its just a waste of money and can do more harm than good. Extra detergent can leave soap residue on the clothes that will need to be washed off using more water and electricity.Myth 7: Frequent vacuuming can wear your carpet out. Many people believe that frequent vacuuming can wear it out faster when it’s the total opposite. The best thing you can do to keep your carpet clean and increase its longevity, is to clean it regularly. This will also help to keep it clean for longer periods of time.Myth 8: If it smells clean, then it must be clean. Just because something smells flowery and fresh doesn’t mean it is clean at all. Scents deodorize but do nothing for the actual cleanliness of the area. The safest and most effective clean is odorless.Myth 9: Steam cleaning your carpet can cause it to mold and stink. Most people worry about the stale smell after you have your carpets cleaned, however, this is the best way to keep your carpets clean. Once the carpets are dry, the smell goes away and leaves you with the cleanest carpets you’ve had since they were new.Myth 10: Newspaper is the best thing to use to clean windows. Sure, newspaper is a good alternative to paper towels, however, its not always ideal. It can take the link out of the glass windows, but you run the risk of smearing ink from the newsprint on the frames and the glass. Most times, paper towel and a good cleaning agent is a better idea. We hope you enjoyed learning more about these common cleaning myths and the information will be helpful for you!

0 Clutter Cutting Ideas for the End of the Year
At this point in the holiday season most of us are anxiously waiting to visit with friends and relatives, exchange gifts, and we are busy running from one holiday gathering to another. Even during the chaos of the season its important to look to look ahead. Chances are you’re going to receive a gift of some sort or maybe even multiples and you’re going to need somewhere to put everything. These tips will help you declutter and go into the new year organized.Get One, Toss Two This is a simple decluttering trick you can use as you put away new holiday gifts. For each gift received, toss or giveaway two others. Maybe you’re putting away some new clothes and already have a closet full, or maybe you’re setting up a new gaming system or putting new DVD’s away. Whatever it is, be sure to re-home some of your older items, sure to be of no use now with your new things.Reuse all those BoxesIf you’re an online shopper, or have received packages from relatives or friends afar, challenge yourself to use the boxes instead of recycling them right away. Fill every box with items for donation and deliver them to a charity before the end of the year. This is a great way to reuse and declutter all at once.Celebrate the Japanese New YearCleaning dirt, clutter and disorganization from the old year is a part of the Japanese New Year. Each year is seen as separate and distinct, so the final week of the old year is dedicated to cleaning, decluttering and organizing. Take the time to clean your home from top to bottom, clean up your filing cabinet out, and tidy up your children’s toys and craft supplies.Sort Before StoringWhen it comes time to take your holiday decorations down and store them until next year, it can be easy to put items away and deal with them later, even if you know you’re not going to use them. This year, get a head start on the clutter. Box up decorations, linens and specialty items you store to prepare them for donation. If you have items that are of no use, throw them away. Streamlining your decorating in advance will make next year a breeze.Say Goodbye to White Elephant ClutterThe white elephant gift exchange is always a fun idea; however, it can leave you stuck with items that you will never use. Consider keeping a box of items that can be re-gifted. Games, gift baskets, etc. are great re-gifting ideas for other occasions in the year. Another fun idea-hold an after Christmas white elephant exchange. Who knows, you may end up with something you’ll use or an even better item for future re-gifting. What is your routine for clearing clutter in your home?
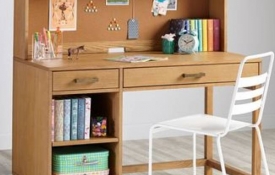
0 Top 5 Back to School Organization Tips for Families
The end of summer is a busy time of the year for everyone in your family. School is just starting, sports teams are kicking into gear, and your house is probably a disaster like the rest of ours are. These back to school organization tips are sure to keep your house in tip top shape, save your sanity and even earn you a few spare minutes of downtime.Keep, donate and throw away.This time of the year is perfect for overhauling your kids’ wardrobes. If you haven’t emptied out their old clothes that no longer fit, now is the time. Create a keep, donate and throw away box and get to emptying out those closets. Not only will this make for less clutter, you’ll have room to store those new school clothes you purchased for them!Clean out the bathroom. Head into the kid’s bathroom with the same determination as you did their rooms. Time to throw away those broken bobby pins, over stretched elastics and old hair and makeup supplies. While you’re in there and at it, make a list of what you’ll need to replace so the next time you head out on a shopping trip you won’t forget anything crucial to the morning routine. If you have more than one child, peek at your local dollar store for coloured baskets and give one to each child to store their supplies in.Create a set homework spot. Creating a homework center in your home is always a great idea with school aged kids. Having a place where they can go to complete projects without distractions is essential to their success and productivity. Stock the spot with school supplies and file folders. If you’ve already got a spot, swap the old for the new so the area is tidy and clean for the school year ahead.Organize a backpack zone in your entryway. During such a busy time of the year, your entryway is likely going to become a drop zone for backpacks, coats, shoes, etc. Having a designated space for these items can help to keep the chaos contained and will make it easy to find what you or the kids are looking for when you need it.Prepare your laundry room. The laundry room is one of those places in a home that most of us tend to neglect when it comes to regular cleaning. Take the extra few minutes during this busy time of the year to wipe down the counters, the inside and outside of your washer and dryer, the floors and more. Preparing yourself for the endless loads of laundry that are coming your way during the school year will make the transition much easier. Do you have any tips that make the transition from summer to fall easier?
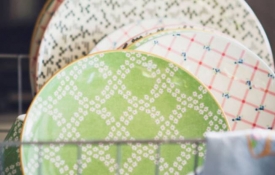
0 How often should I wash that?
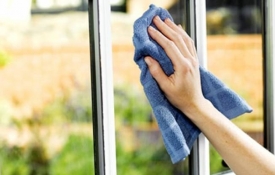
You may find yourself wondering how often you should wash certain items in your home. Here at Perfection Cleaning we wanted to give you the low down in a quick easy format of how often you should be washing items for the health and safety of you and your loved ones.1. BedsheetsSheets should be washed once a week in hot water and run through the dryer on high heat. Washing often and on high heat removes debris, dust, sweat and more. 2. GroutCleaning the grout may be something you dread but relax! You only need to scrub it or any tiled surface in your home once a year. 3. Windows and screensWindows should be washed inside and out twice a year. When the warm weather arrives, be sure to rinse your screens to. Use a garden hose and gently scrub any debris away. Then use the hose to rinse and leave the screens to air dry in the sun. 4. Your mattressClean your mattress every 6 months. Believe it or not the process is super simple! Vacuum the top using an upholstery attachment and remove stains by wiping down the surface with upholstery cleaner and a rag. 5. Your ovenClean your oven every six months. If your oven is self-cleaning, turn it on and let it do the work. If not, remove racks and let them soak in hot, soapy water. Spray the interior with oven cleaner and let it soak overnight. Wipe clean and replace the racks the next day. 6. CarpetsOnce a year hire someone, or rent or buy a steam cleaner. If you’re doing the cleaning yourself, vacuum first to remove surface dirt, then steam clean using an appropriate solution. After you’ve completed both steps, run over the carpet a third time with only water to limit the residue left behind. 7. DishwasherClean your dishwasher once a month. Dishwashers are the perfect home for black yeast and fungi that can be harmful to you and your family. Running a cup of vinegar upright on an empty top rack should do the trick. Then, finish by running a cycle of hot water through. 8. PillowsWash your pillows every 3 to 6 months to avoid fungi and dust mites. Pillows can be washed on the gentle cycle of your washing machine in hot water with liquid laundry soap. Be sure to run the rinse twice. To dry, put pillows in the dryer and set on low. 9. Your ComputerClean your keyboard as often as needed as they are known to hold five times more bacteria than a toilet seat. Computers are one household item many people never think to clean. For crevices, use a Q-tip dipped in rubbing alcohol and for the other parts rubbing alcohol on a rag should do the trick. 10. Kitchen sink and drainClean your sink and drain daily because of their high exposure to microorganisms. Disinfecting wipes are great for wiping these surfaces down.These 10 tips are a sure way to stay on top of those often forgotten items to clean! If you're in need of assistance, give us a call today!
 CALL TODAY FOR A FREE ESTIMATE! FRASER VALLEY/SURREY OFFICE: (604) 625-0050 -or- COQUITLAM/TRI-CITIES OFFICE: (778) 945-8600
FRASER VALLEY/SURREY
(604) 625-0050
perfectioncleaningbc@yahoo.ca
COQUITLAM/TRI-CITIES
(778) 945-8600
perfectioncleaningvan@yahoo.com
All material contained within this website ©2008- Perfection Cleaning BC.